Deploy the CurrentWare Client to Your Devices

Deploy the CurrentWare Client to Your Devices

Estimated time: 5–10 minutes  ·  Windows & macOS

Overview Your CurrentWare Cloud tenant is ready - the next step is deploying the CurrentWare Client (agent) to your organization's computers. No data appears in your dashboards and reports until agents are installed, so this is the most important step after setup. This guide covers the three deployment options and how to manage your devices once they're connected.
Notes
Prefer an interactive walkthrough? Follow along with our step-by-step demo.


Step 1: Open the Deploy Clients Page

Log in to your CurrentWare Cloud portal, then go to Tools > Deploy Clients. This page contains everything you need to install the agent across your organization.
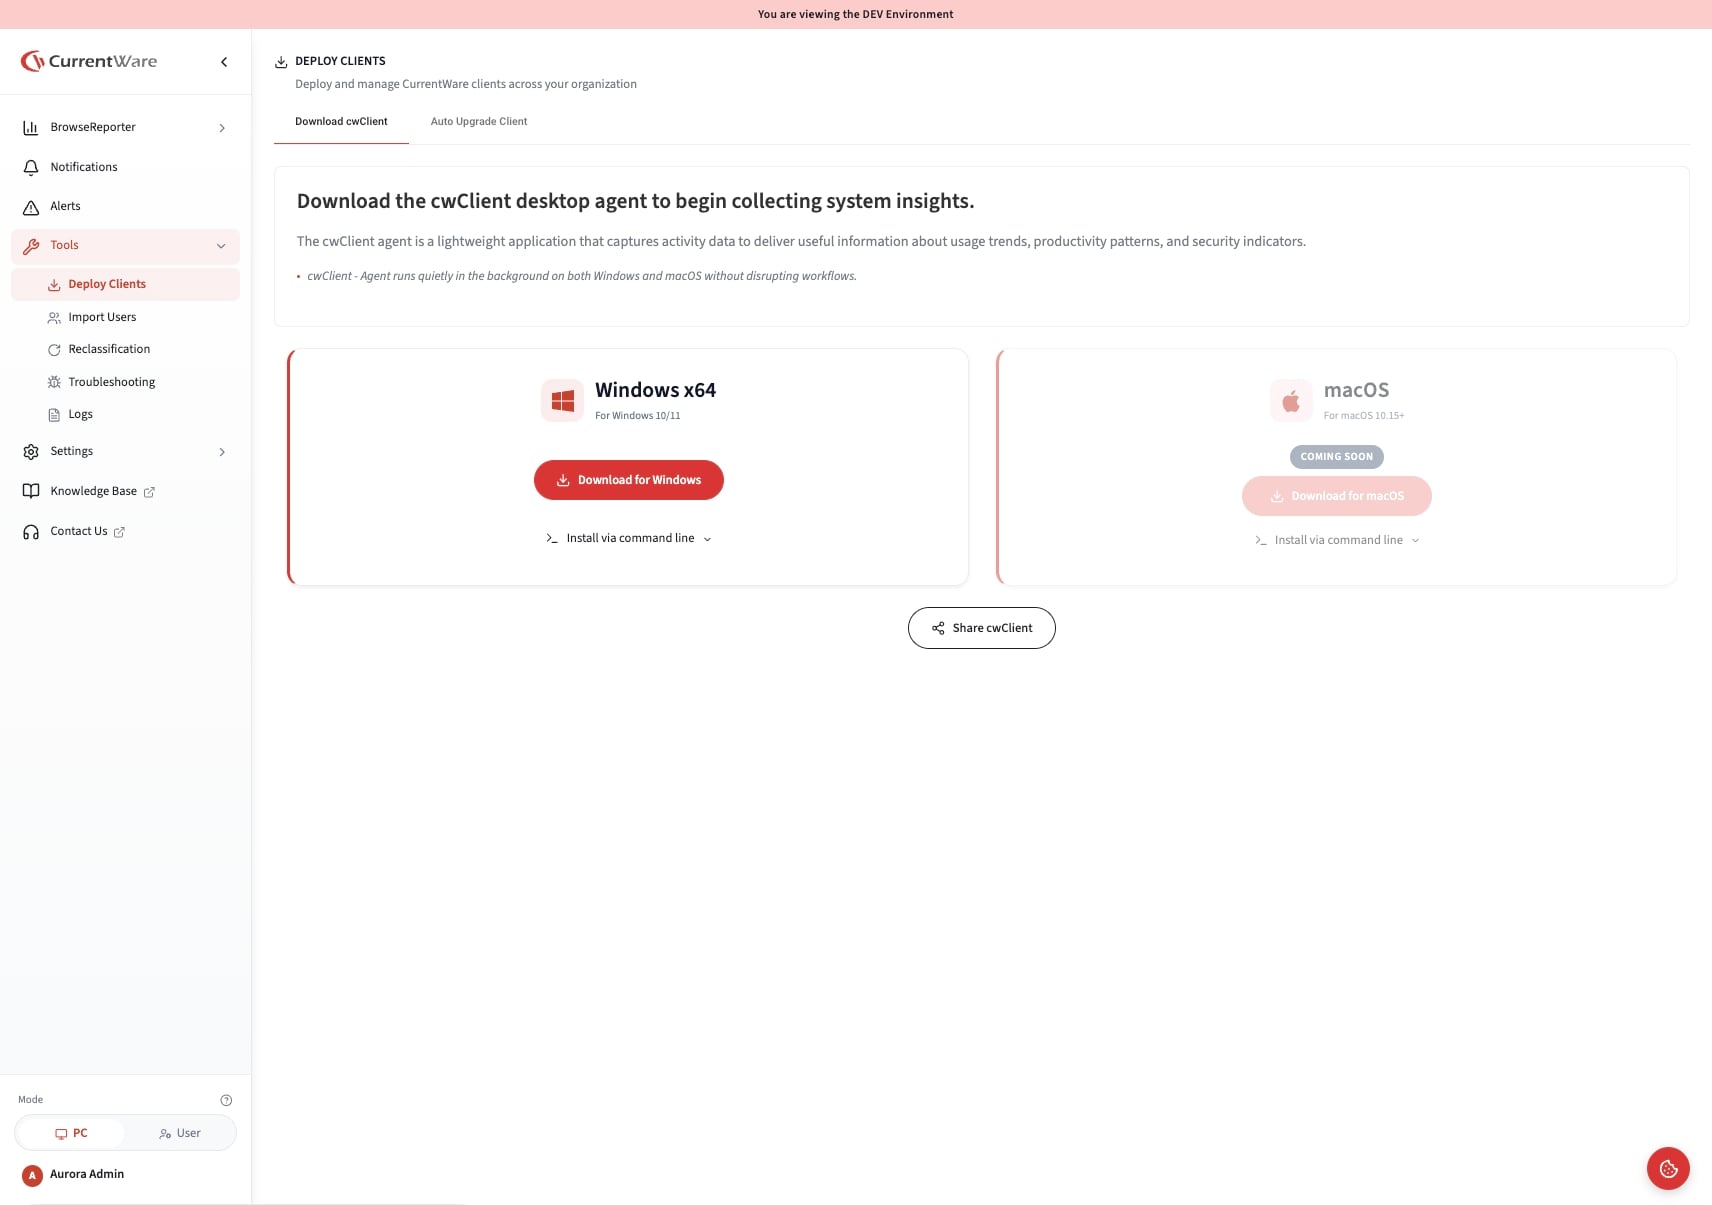
CurrentWare Cloud portal with Deploy Clients option highlighted in the Tools menu

Step 2: Choose Your Deployment Method

Pick the option that best fits the size of your rollout:

a) Direct download - Download the installer for Windows or macOS and run it on each device. Best for small deployments or testing on a handful of machines.
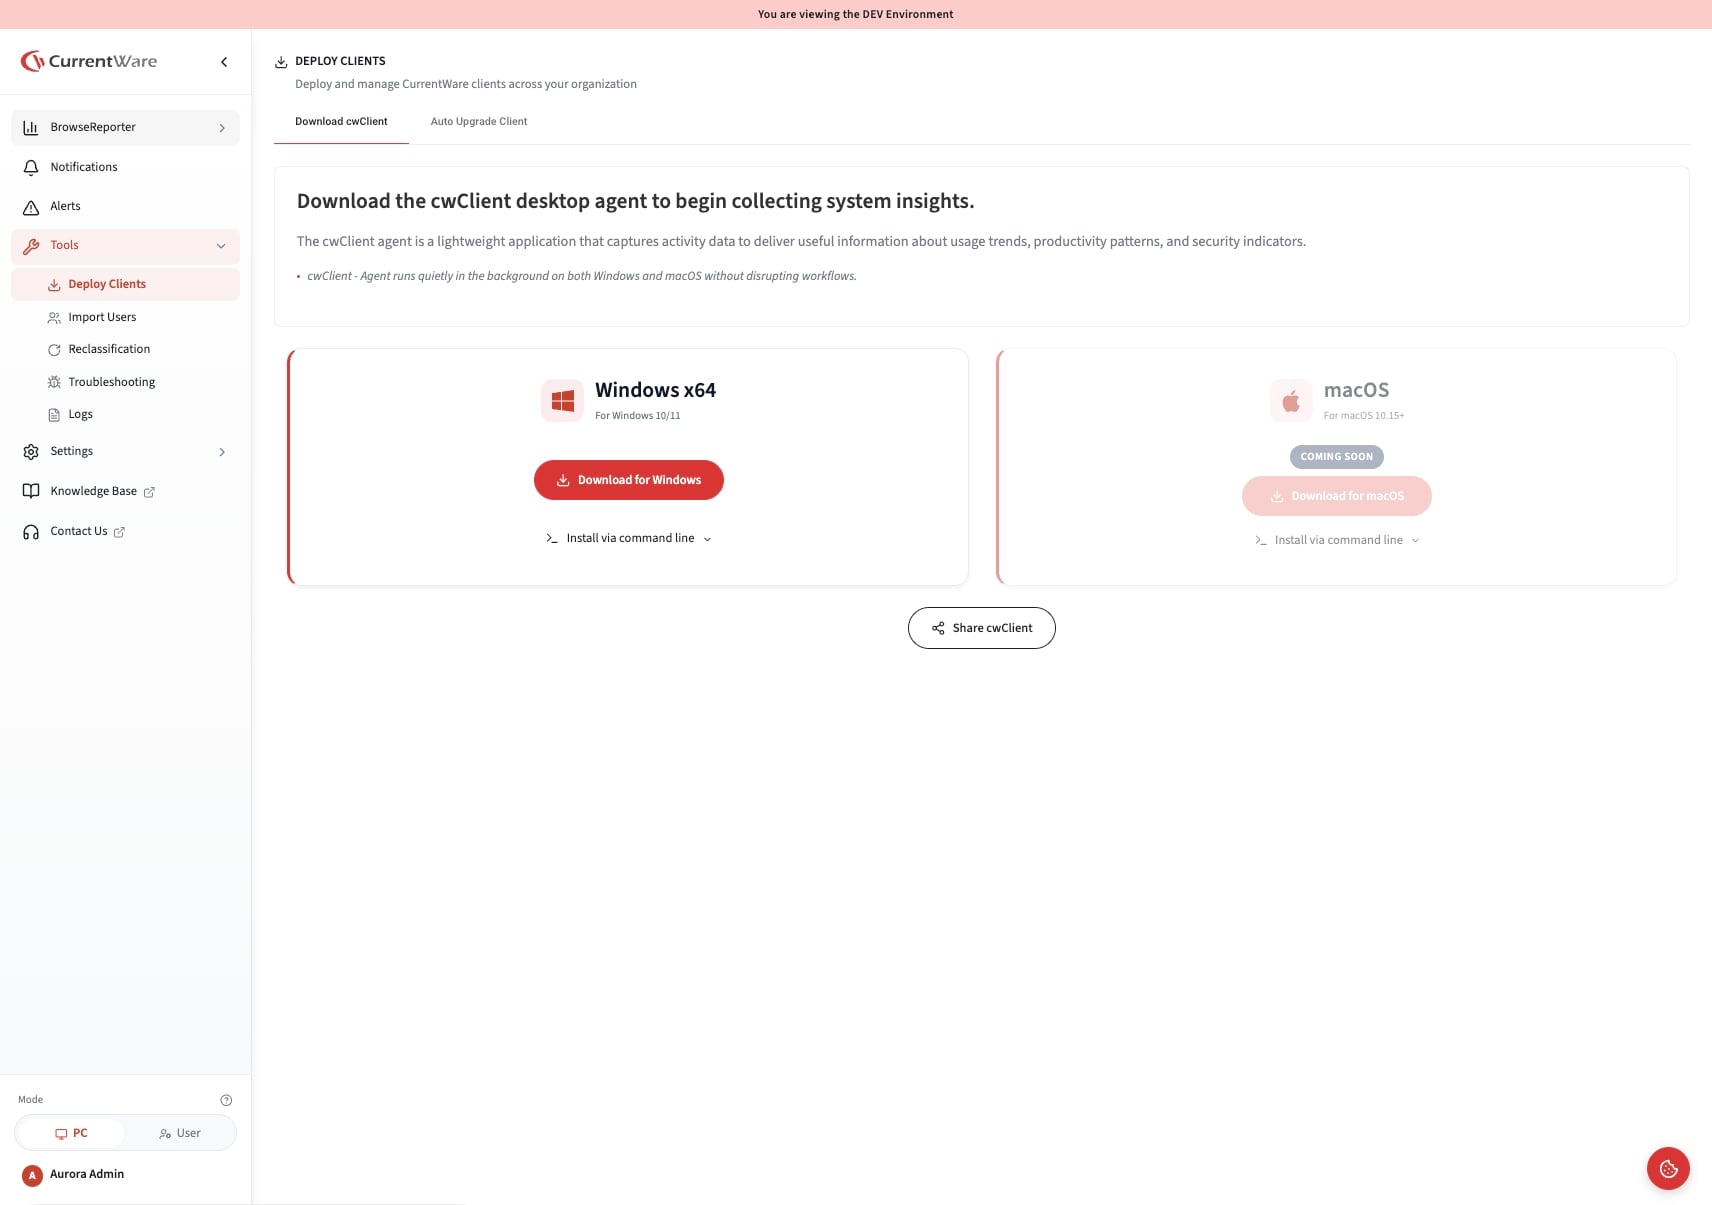
Deploy Clients page with Windows and macOS agent download options

b) Silent install via command line or RMM - Managing hundreds of endpoints? Use the command-line install to push the agent silently through your existing RMM or deployment tool - no end-user disruption and no manual work on each device.

c) Share the install link - Send your tenant's unique agent install link to team members so they can install the agent themselves and start reporting data in minutes.

Notes
The command-line install requires administrator privileges on the target machine. Running the installer manually may cause multiple Windows UAC prompts based on security settings.

Step 3: Manage Your Deployed Devices

Once agents are installed, open the Manage page to monitor, organize, and control every deployed endpoint from one place. From here you can:

a) Organize devices into groups - Create and manage groups, then move devices between them to match your teams or departments. Groups make it easy to apply policies and run reports on the right sets of devices.

b) Check connection status - Devices appear in a single, unified view that clearly shows which endpoints are connected and which are offline.

c) View client service details - Select any device to see its client info, status, and performance metrics.
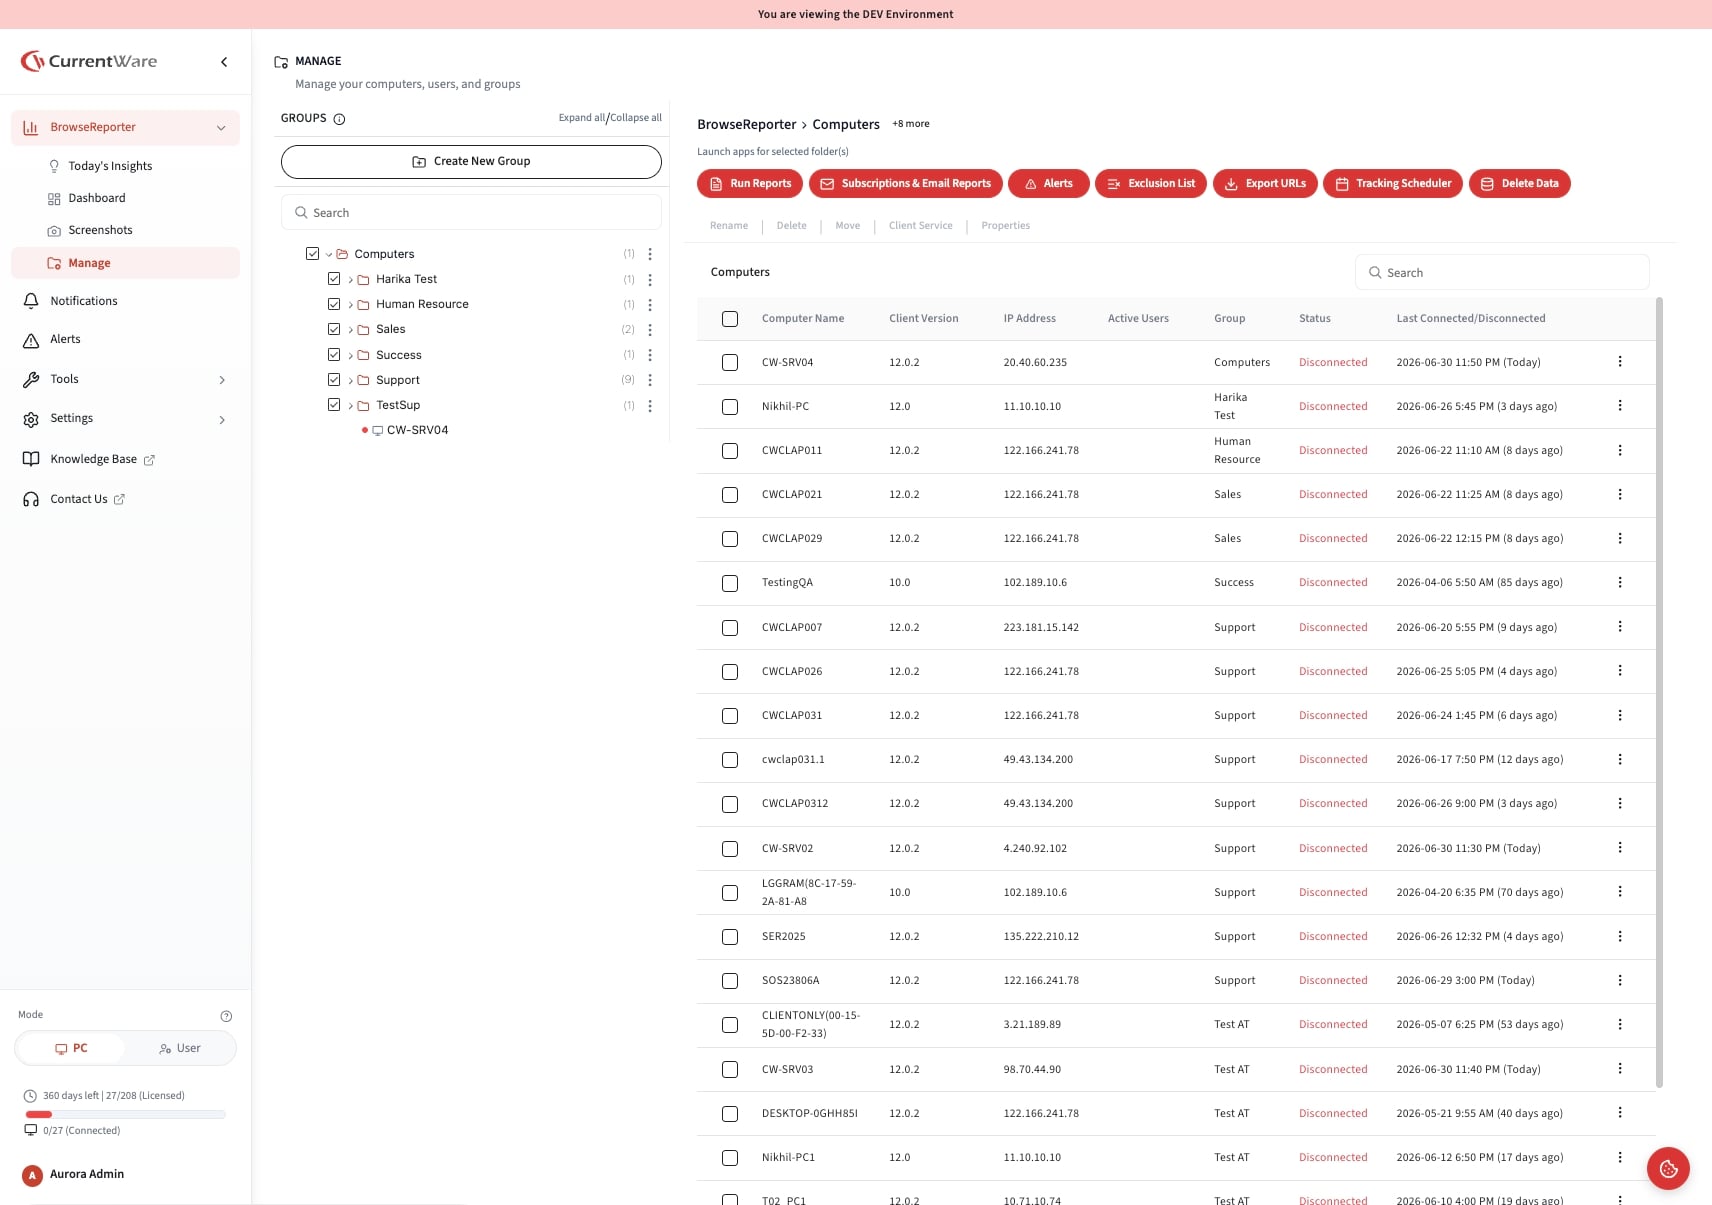
Manage page showing deployed devices, groups, and connection status

Step 4: Confirm Data Is Flowing

As agents come online, activity data begins flowing into your tenant automatically. Give it a few minutes after installation, then check your dashboards and reports to confirm your devices are reporting.

Notes
If a device shows as offline, verify the agent installed successfully and that the machine has an internet connection.
✅ You're all set! Your devices are now reporting to CurrentWare Cloud. Need a hand with a larger rollout or have deployment questions? Our support team is here to help - reach out anytime.

    • Related Articles

    • System Requirements (CurrentWare Cloud)

      CurrentWare Cloud is a fully hosted, managed version of CurrentWare - there's no server to install, patch, or maintain. CurrentWare hosts and manages the backend infrastructure for you. All you need to install is the lightweight CurrentWare Client on ...
    • Setting up CurrentWare Cloud

      Estimated time: 5–10 minutes · No server setup required Overview CurrentWare Cloud gives you complete visibility into how your team uses their computers - without managing any infrastructure. This guide walks you through signing up for a 14-day free ...
    • Try CurrentWare Cloud free for 14 days

      Get full access to CurrentWare Cloud with no feature restrictions* for 14 days. Install the lightweight agent on your compatible Windows or MAC computers and manage everything through the cloud, no on-premises server required. No credit card ...
    • Installing the CurrentWare macOS Client

      How to Install and Manage the CurrentWare Agent on macOS (Cloud) Estimated time: 15–20 minutes Overview The CurrentWare macOS client lets you monitor and manage Mac computers right alongside your Windows fleet, all from the same CurrentWare Cloud ...
    • How to Change the Server Timezone in CurrentWare Cloud

      Estimated time: 2 minutes Overview The Server Timezone setting controls how timestamps appear across your CurrentWare Cloud console. If your data is showing times that don't match your local time, updating this setting will correct it. Client side ...